Accessing S3 via the MinIO Client
Once your objectspace exists and is reachable — whether via the portal UI, CLI,
or API, and whether exposed publicly through
Ingress or only reachable inside
its cloudspace — you can manage its buckets and objects with the MinIO
client, which offers UNIX-like commands (mc) to manage buckets and objects. Many other clients
and applications also support the S3 protocol; this page covers MinIO specifically.
Accessing objectspaces from MinIO client
First Scenario : Using VM within our cloudspace
We will access our objectspace from an existing Virtual Machine on our cloudspace. So we will create a VM and use it to configure MinIO Client and access our objectspace.
If you don't know how to create a VM check the Virtual Machine documentation and create a VM with Ubuntu Desktop 20.04 image and configure it as you like.
-
After successfully creating the VM, you will be redirected to the VM details page.
-
Click Console at the top of the VM details page.
-
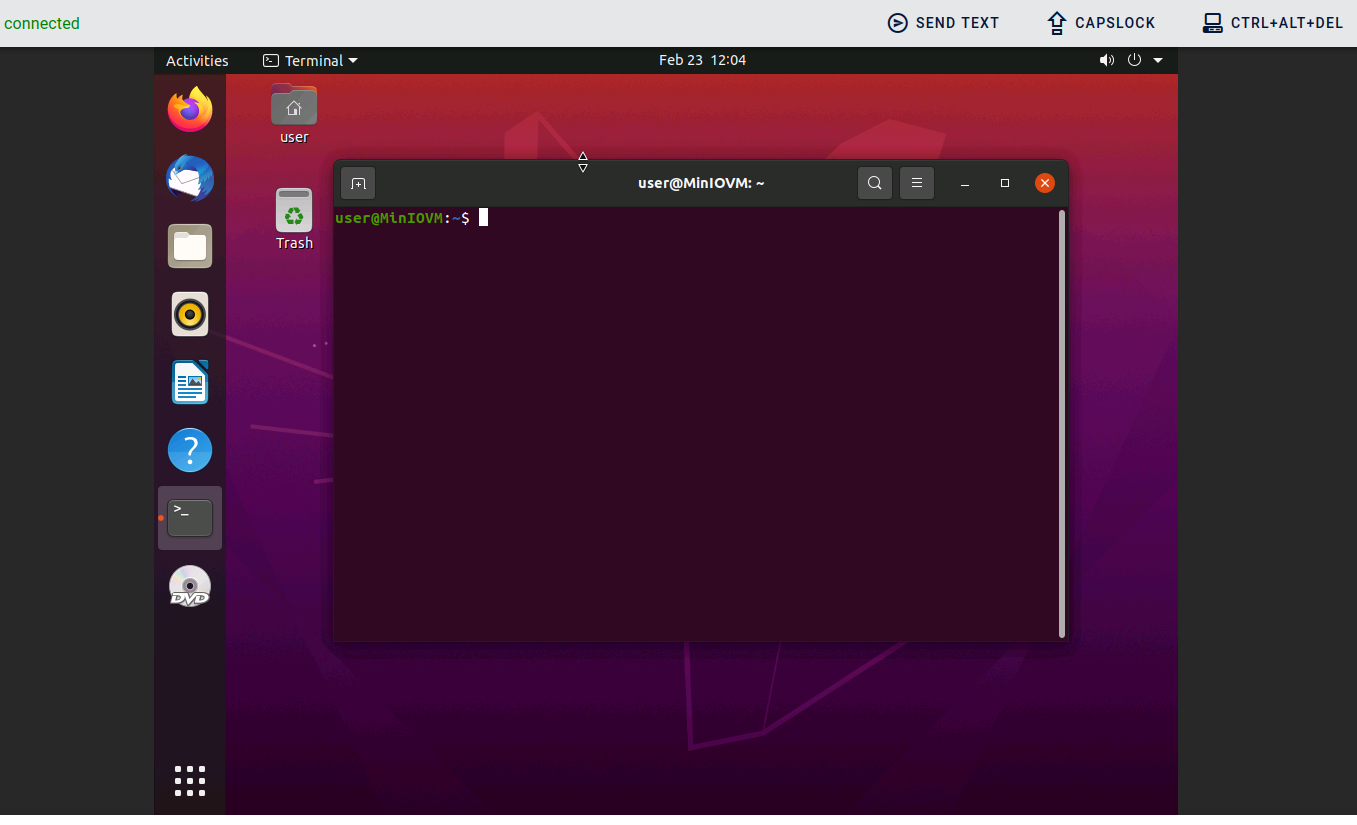
Your VM will start, enter your Initial Password (you will find it in the VM details page). Then open up the terminal on your VM.
-
Now we need to install MinIO Client on our VM using this command
-
Type
chmod +x mcto make the mc file executable.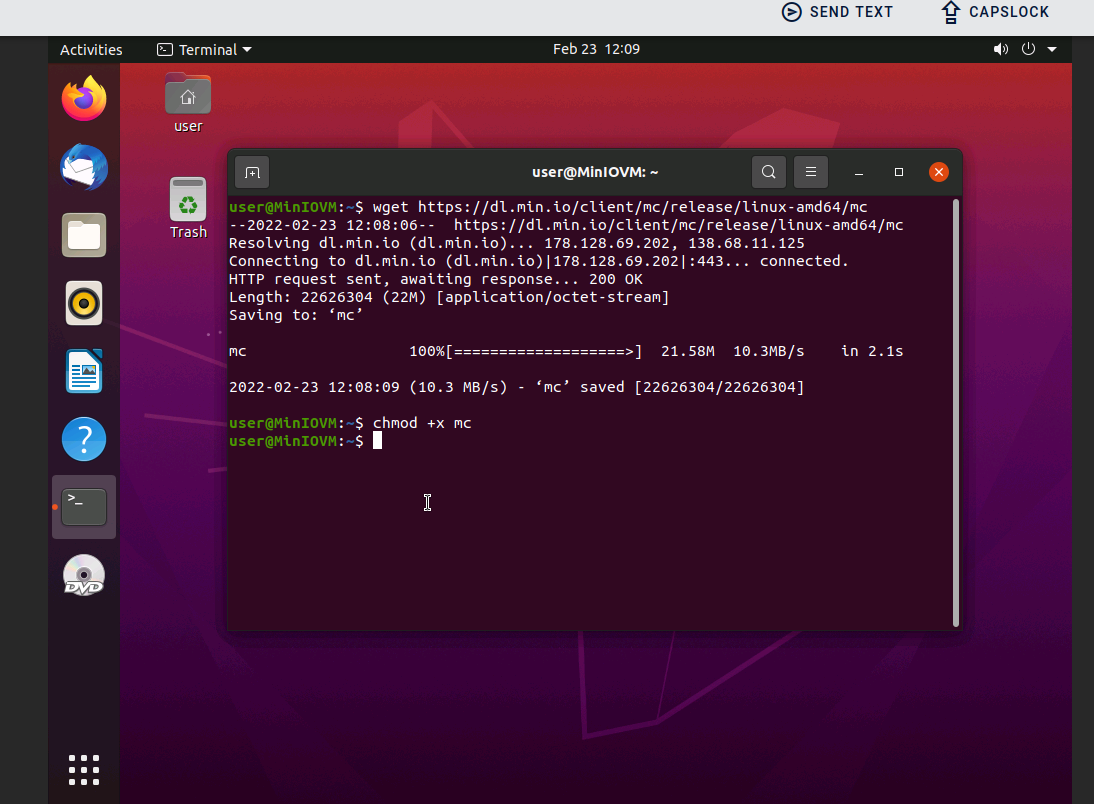
Tip
You can also use the built-in MinIO client provided on the ISO Image which is attached to every VM by default. First, access the root on the VM terminal using
sudo -ithen use these two commands:mount/ dev/sr1 /medials /media/tools/linux/minio-client/mc
-
Now we can access our objectspace and give it an alias using this command
- Where ALIAS is the alias you choose for your objectspace and we will use the name s3Local, but you can name it as you like.
- You can find CLOUDSPACE_IP, ACCESS_KEY and SECRET values in the objectspace details page.
- CLOUDSPACE_IP is the IP address under the CLOUDSPACE CONNECTIONS tab

-
We can create a new Bucket using this command.

-
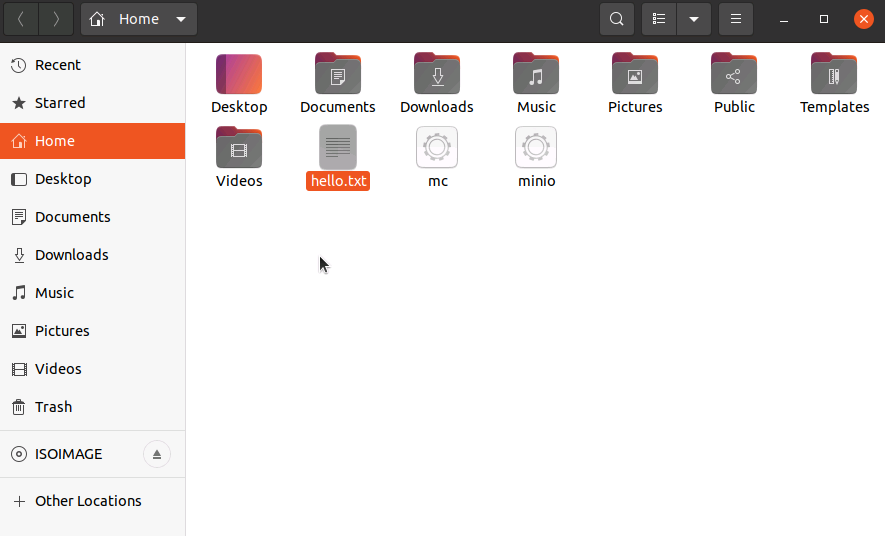
To test the new bucket and the connection between the VM and the objectspace, we will create a text file using this command.
-
Use this command to upload the file from the machine to the objectspace.

-
To list the content of the bucket use this command, and you will find the file that we have uploaded available on the bucket on our objectspace.

Second Scenario : Using machine from outside the cloudspace
-
We will access our objectspace from outside our cloudspace. So we will configure MinIO Client on our local machine to access the objectspace within our cloudspace.
-
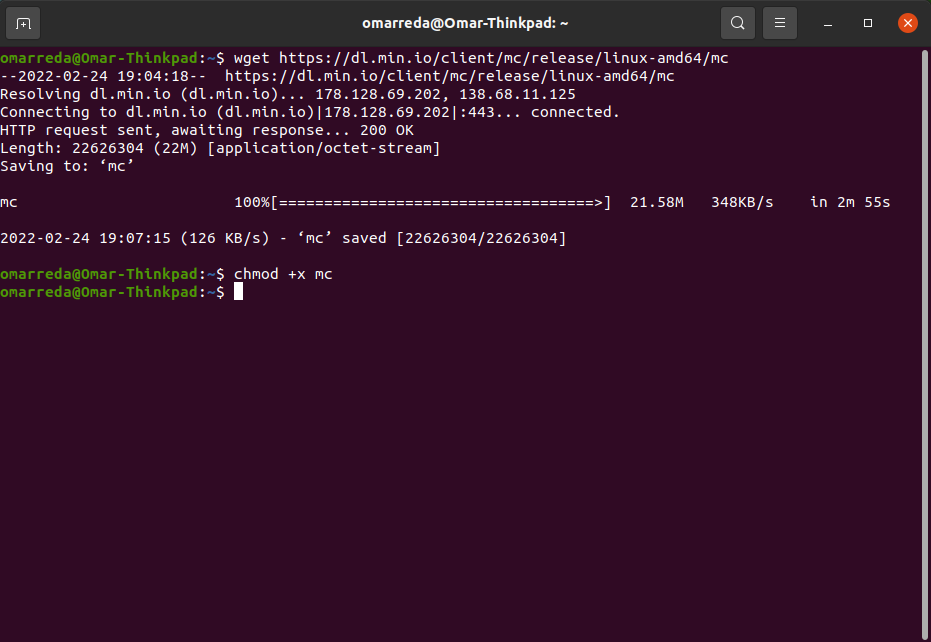
Use these commands to install MinIO Client on our machine and make the mc file executable.
Tip
If you are using another operating system then check MinIO Download to download the version that is compatible with your operating system.
-
Now we can access our objectspace and give it an alias using this command.
-
Where ALIAS is the alias you choose for your objectspace and we will use the name s3External, but you can name it as you like.
-
You can find ACCESS_KEY and SECRET values in the objectspace details page.
-
DOMAIN_NAME is the domain we have added in our reverse proxy and PROXY_FRONT_END_PORT is the port that we have added to the Proxy Front-end.

-
-
We can create a new Bucket using this command.

-
To test the new bucket and the connection between the VM and the objectspace, we will create a text file using this command.
-
Use this command to upload the file from the machine to the objectspace.

-
To validate that you uploaded the file successfully, use the list command to display the content of your bucket.

-
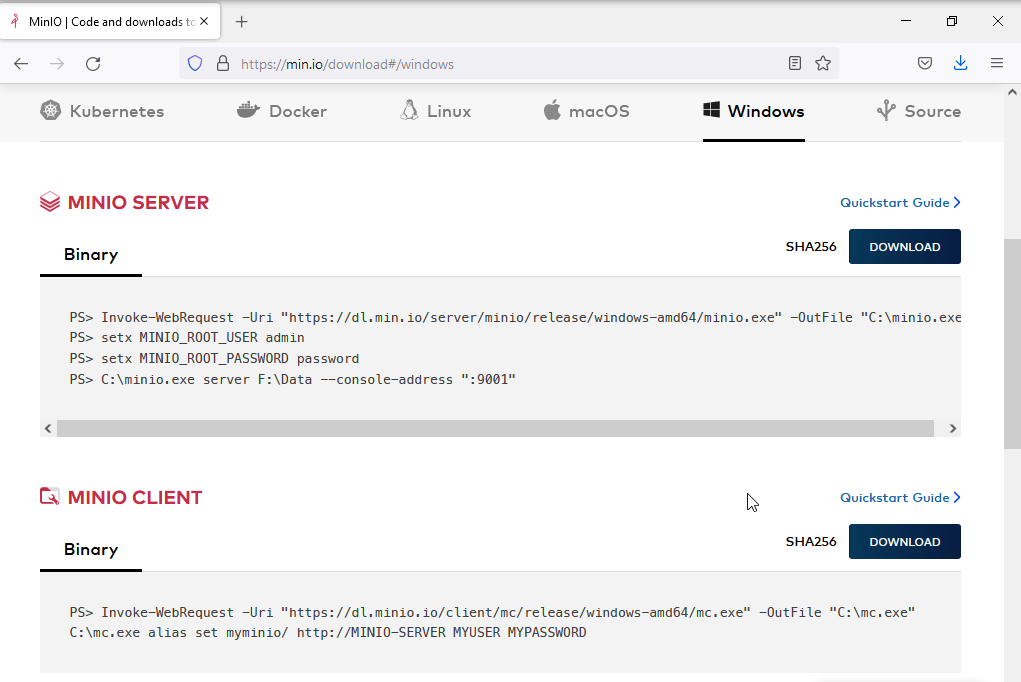
First, we need to install MinIO Client on our machine. Open MinIO Download and download the MinIO Client executable file.
-
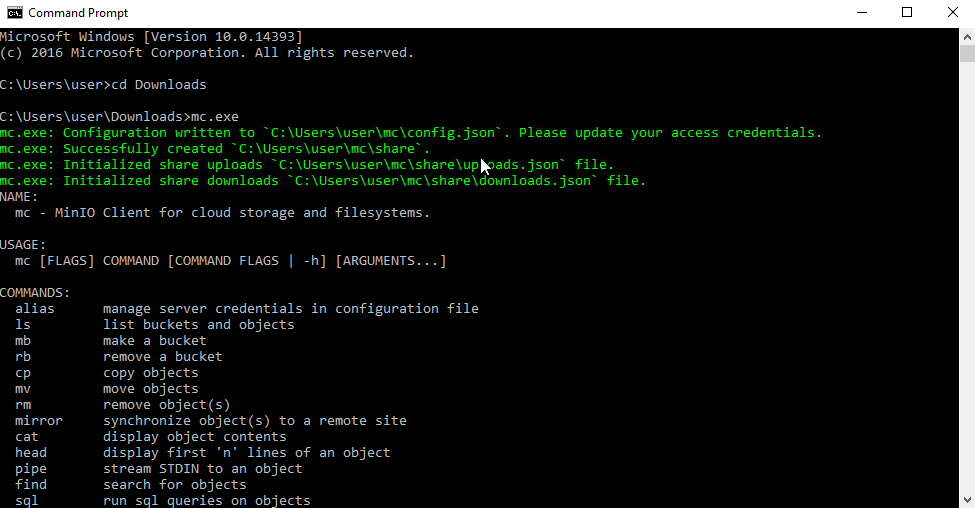
Open the Downloads directory (where you downloaded the MinIO Client) in your Windows Command Line, then type run the MinIO Client in the command line.
-
Now we can access our objectspace and give it an alias using this command.
-
Where ALIAS is the alias you choose for your objectspace and we will use the name s3WindowsExternal, but you can name it as you like.
-
You can find ACCESS_KEY and SECRET values in the objectspace details page.
-
DOMAIN_NAME is the domain we have added in our reverse proxy and PROXY_FRONT_END_PORT is the port that we have added to the Proxy Front-end.

-
-
We can create a new Bucket using this command.

-
To test the new bucket and the connection between the VM and the objectspace, we will create a text file using this command.

-
Then use the command to upload the file from the machine to the objectspace.

-
To validate that you uploaded the file successfully, use the list command to display the content of your bucket.

-
Sharing Files from External Services
If you want others to share content to your objectspace, you can create an Upload Link for your objectspace to allow external services to upload files to your storage.
Upload File using a VM within your Cloudspace:
-
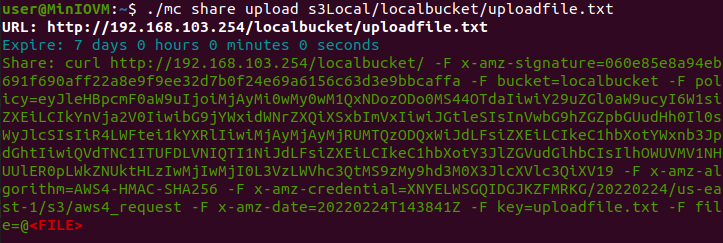
To start uploading the file use this command
-
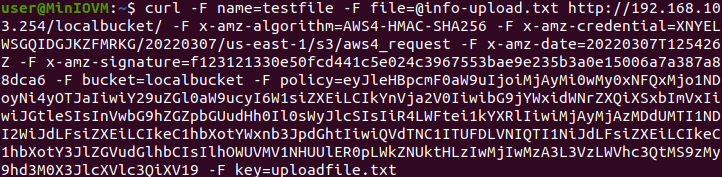
Create a temp file named "info-upload.txt" in your home directory, then use this command to upload this file from your local machine to your cloud storage.
Tip
The URL generated using the share command has several attributes like: Upload Path, Signature, Bucket Name, Upload Policy, Key, Credentials, etc. All are needed to give the authorization for uploading files to your cloud storage.
-
To validate that you uploaded the file successfully, use the list command to display the content of your bucket.

Tip
You will notice that the name of the new uploaded file is uploadfile.txt instead of info-upload.txt, because we used the uploadfile.txt as a key when we created our upload link. So if you want to upload multiple files you will need to create multiple links with different keys.
Upload File using your local Machine:
-
For both Linux and Windows users.
-
To start uploading the file use this command
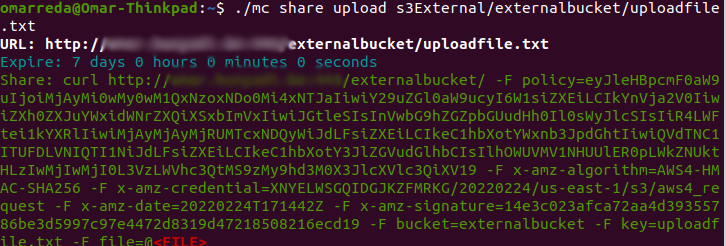
-
Create a temp file named "info-upload.txt" in your home directory, then use this command to upload this file from your local machine to your cloud storage.
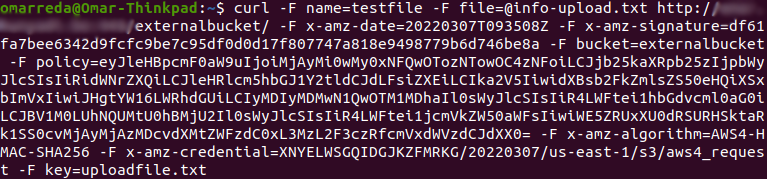
Tip
The URL generated using the share command has several attributes like: Upload Path, Signature, Bucket Name, Upload Policy, Key, Credentials, etc. All are needed to give the authorization for uploading files to your cloud storage.
-
To validate that you uploaded the file successfully, use the list command to display the content of your bucket.

Tip
You will notice that the name of the new uploaded file is uploadfile.txt instead of info-upload.txt, because we used the uploadfile.txt as a key when we created our upload link. So if you want to upload multiple files you will need to create multiple links with different keys.
-
To start uploading the file use this command

-
Make sure that you have curl installed on your machine, if you don't please check curl for Windows and download the version that is compatible with your Windows version.
-
create a temp file named "info-upload.txt" in your Downloads directory, then use this command to upload this file from your local machine to your cloud storage.

Tip
The URL generated using the share command has several attributes like: Upload Path, Signature, Bucket Name, Upload Policy, Key, Credentials, etc. All are needed to give the authorization for uploading files to your cloud storage.
-
To validate that you uploaded the file successfully, use the list command to display the content of your bucket.

Tip
You will notice that the name of the new uploaded file is uploadfile.txt instead of info-upload.txt, because we used the uploadfile.txt as a key when we created our upload link. So if you want to upload multiple files you will need to create multiple links with different keys.
-
Check MinIO Documentation to learn more about pre-signed upload links and how you can integrate them in your applications.